Creating a JCheckBox
In Swing, the JCheckBox allows the user to select, or un-select, an item which is displayed. Any number of boxes can be selected at one time. Each box displayed is one JCheckBox.
A checkmark will be used to choose a box.
JCheckBox often uses the methods isSelected and setSelected.
 To select, or un-select, a box, use the setSelected(boolean) method.
 To check if a box is selected, use the isSelected() method.
The JCheckBox and the JRadioButton are subclasses of JToggleButton.
A toggle button is a two-state button which operates like a light switch, on or off.
Note: While a JCheckBox allows for the user to make multiple choices at one time, the JRadioButton allows the user only one choice at a time.


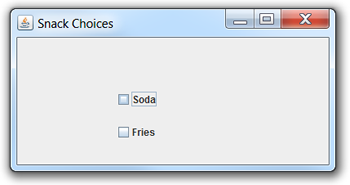
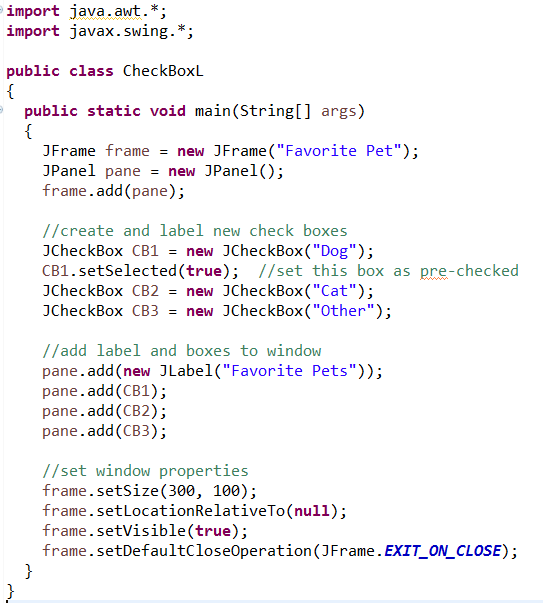
These first code example below is only "displaying" the JCheckBox options shown above.
No event coding is generated in this example.
Note: In this example, one of the checkboxes is "pre-checked". Such a choice is at the
discretion of the programmer, and is most likely NOT a desired option in most cases.
It is used here for coding demonstration only.

When creating interactive components, the interface ActionListener will be needed so that the event created by the check (in this example) can be activated. Remember that import java.awt.event.*; will be needed.
(Note: When creating interactive checkboxes, the interface ItemListener may also be used.)
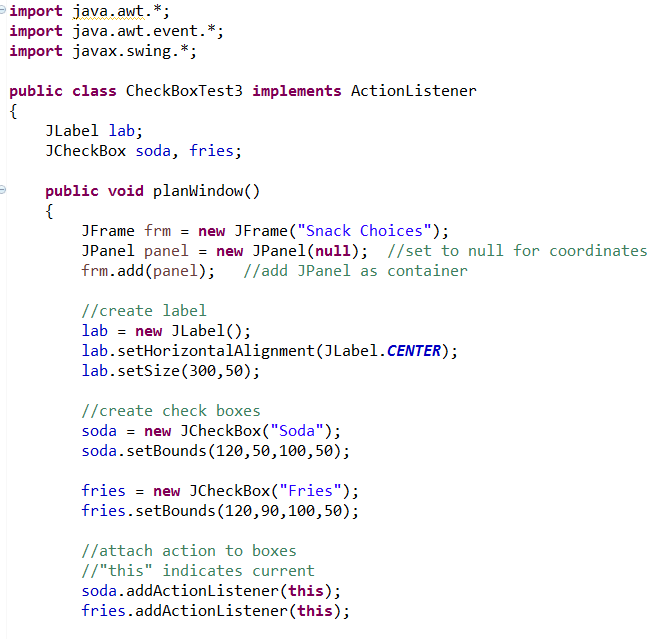
 Steps to Establishing an Active CheckBox:
1. Indicate the class "implements ActionListener"
2. Declare (name) a checkbox variable
3. Create a "new" checkbox and give it a label
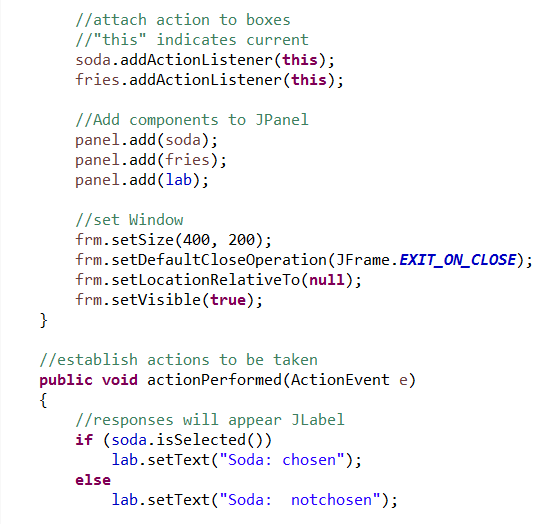
4. Attach "action" to the checkbox ("addActionListener(this)")
5. Add checkbox to the Jpanel
6. Establish action to be taken method ("actionPerformed")
Remember that when a JCheckBox is checked,
an event will be generated and something will happen. |

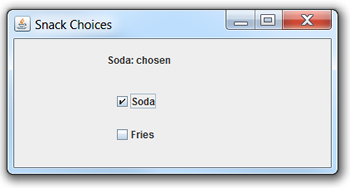
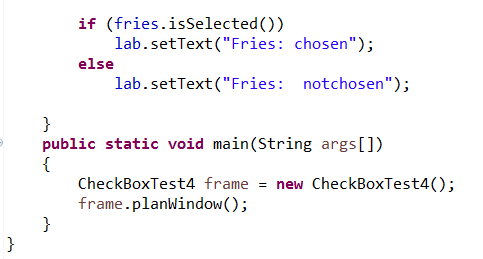
Example: A message is displayed as checkboxes "Soda" and "Fries" are checked and unchecked. Four possible choices can appear: "Soda: chosen"; "Soda: not chosen"; "Fries: chosen"; "Fries: not chosen".
