By now, you should have created your workspace folder, or have been told where the folder will be located.
For this second task with Eclipse, you will be creating a project, creating a class, typing in a program and running the program.
The program you will be typing, shown below, is to be called HelloWorld.java.

• Access your Eclipse software and have it open on the screen.
• Click on File on the menu bar, click on New, and then on Java Project.
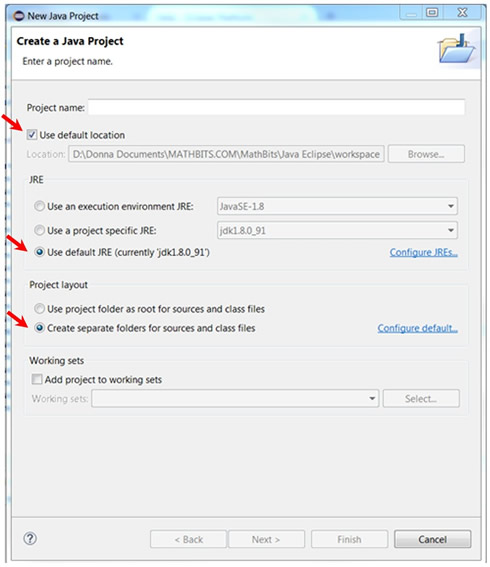
The "New Java Project" wizard (drop down window) will open.
Enter your project "name". Remember: The project name cannot be the same as the .java name. You cannot name this project "HelloWorld".
Notice that "Use default location" will be checked and automatically filled with the location of your designated Eclipse workspace.
Leave the default items under JRE and Project layout checked.
Click Finish.

• In the Package Explorer (left hand panel) of Eclipse, expand your named project (ours is named Task2) and select the src (source) folder.
Right click and choose New - Class. |
|
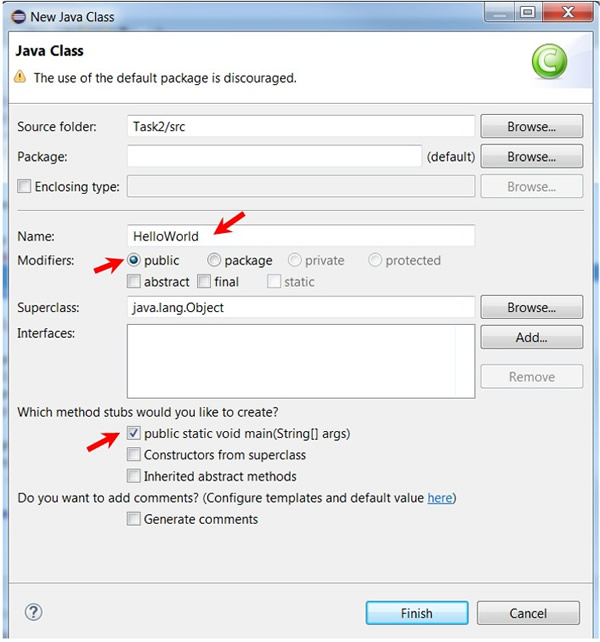
| The Java Class wizard (drop down window) will appear.
The Source folder will be automatically set to coordinate with your project name. Leave it as is.
Leave the Package blank.
Under Name, type HelloWorld (all one word).
Under Name, the radio button for public will be checked. Leave it checked.
Further down the screen, you will want to check public static void main (String[] args). It will save you a little typing time.
Click Finish.

• In the editor window, you will see a couple of lines already typed for you.
• Delete the comment line // TODO Auto-generated method stub
• You are ready to start typing.
• To RUN the program, choose  on the top menu bar. |
|