*Note: ImageIcon is a fixed-size picture (usually very small) used on GUI components.
Also allowable: ImageIcon icon = new ImageIcon("src/dog.gif"));
Our images will be stored in the same file location as the programming code.

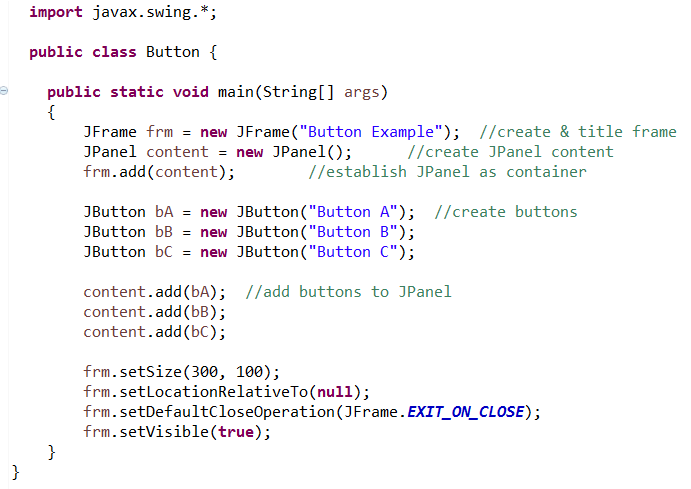
These first two code examples are only "displaying" the JButtons shown above.
No event coding is generated in these examples (nothing happens when the buttons are pushed). Check out establishing a content pane.
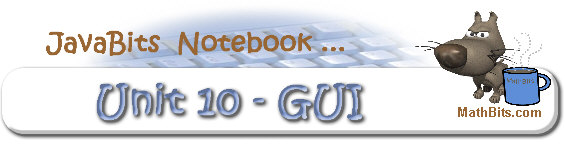
Display Buttons Only - Text Buttons: |
|
|
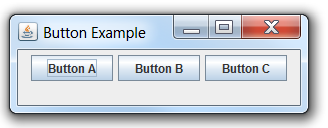
Display Button Only - Image Button: |
|
|
When creating interactive components, the interface ActionListener will be needed so that the event created by the button click (in this example) can be activated. A listener interface is a connection between the "listener" (the user) and the "event source" (the click of the button).
Event "types" have matching listener interfaces. We have seen the MouseListener for Mouse Events in the last unit. There are also other interfaces such as ItemListener and KeyListener. In this unit, we will be concentrating on the use of the ActionListener.
Remember that import java.awt.event.*; will be needed.
The class using the "event listener" must implement the ActionListerner by adding implements ActionListener to the class declaration. An actionPerformed() method must then be defined. This method will receive an ActionEvent argument from the GUI.
 Steps to Establishing an Active Button:
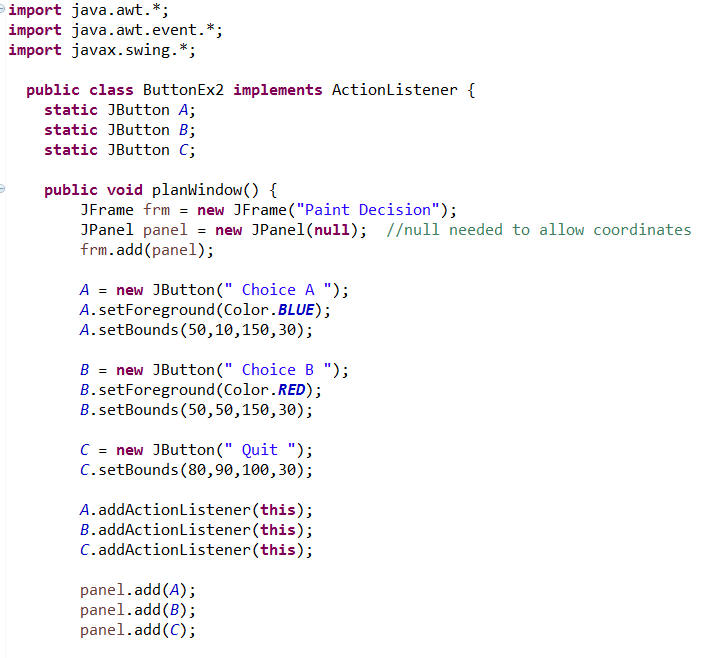
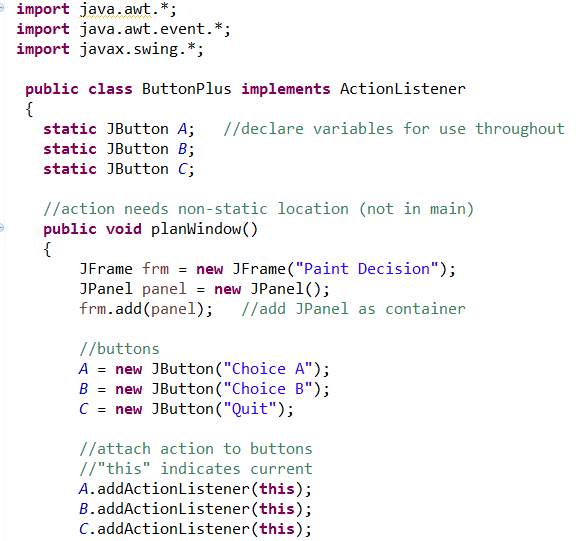
1. Indicate the class "implements ActionListener"
2. Declare (name) a button variable
3. Create a "new" button and give it a label
4. Attach "action" to the button ("addActionListener(this)")
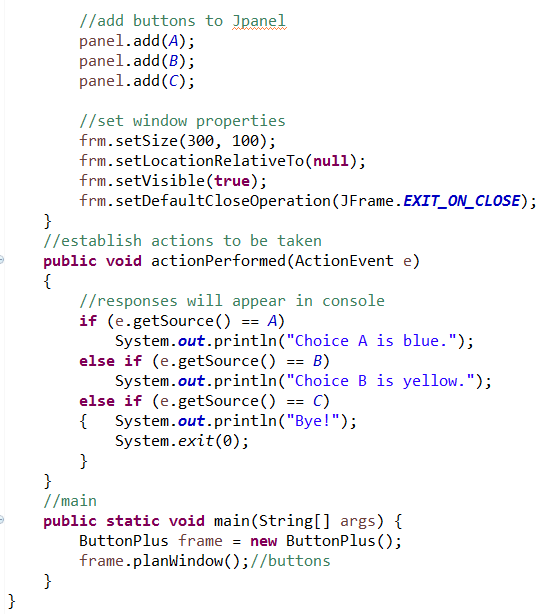
5. Add button to the JPanel (in the order which they will appear)
6. Establish action to be taken method ("actionPerformed")
The getSource() method returns the source of an event.
When a series of buttons exist, this method allows the programmer to determine which button was clicked.
Remember that when a JButton is clicked,
an event will be generated and something will happen. |
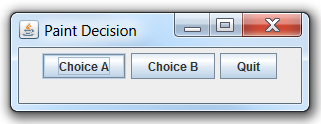
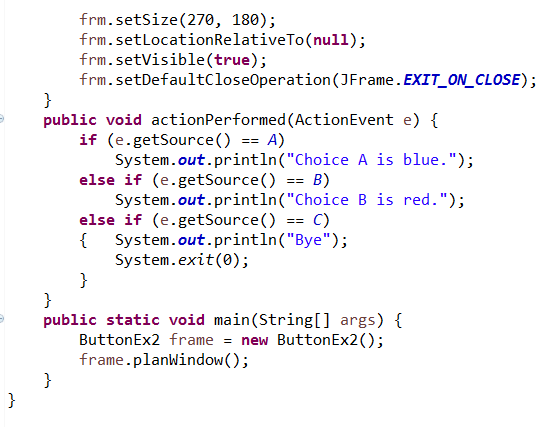
Example: Create buttons to choose an arbitrary paint color for your new bedroom!
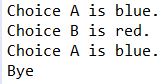
Pressing a button will cause a message to appear in the Console window. Continuing to press the choice buttons will display the second choice message or repeat the first choice message.
|
Console window display: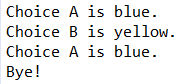 |
Note: In this example, hitting the button changes text appearing in the Console window. It is also possible for a button to cause text changes within the JFrame as we saw in the Label lesson.
Note: The "order" in which the buttons were "added" to the JPanel is significant.
Button A appears before button B because panel.add(A); appeared before panel.add(B); in the coding.
Note: Action needs a non-static location, so the action attachments cannot be placed in main.
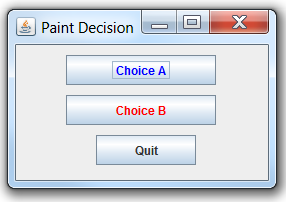
Additional Options for Appearance of Buttons:
// default appearance
JButton A = new JButton(" Choice A "); 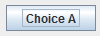
| NOTE: The BorderFactory is a toolkit for creating borders around GUI components. There are a wide range of options. |
//create a bevel edged bordered button
A.setBorder(BorderFactory.createRaisedBevelBorder()); 
Some other options:
LineBorder
RaisedEtchedBorder
LoweredEtchedBorder
LoweredBevelBorder
EmptyBorder
//coloring the button and text in button
B.setBackground(Color.BLUE);
B.setForeground(Color.YELLOW);